Full installation of OSDDlinux
If you want to install OSDDlinux as the sole operating system on your machine or as dual-boot setup having more than one operating system, you can follow the steps given below. (NOTE: After successfull installation of OSDDlinux, users may require passwords which are :- password for sudo: osddlinux; password for root: osddlinux).
Steps for full Installation of OSDDlinux using bootable Live DVD:
- User should download one of the following types of OSDDlinux ISO images available for installation
64-bit Architecture
32-bit Architecture
- After downloading iso image, follow steps given below to make a bootable DVD
- Ubuntu users can use Brasero Disc Burner for burning iso file on blank DVD.
For more Info Click Here.
- Windows users can use NERO software for burning iso file on blank DVD.
- Mac OSX users can use Disk Utility option for burning iso file on blank DVD.
- Insert bootable OSDDlinux Live DVD in DVD ROM device and reboot the machine.
- Ensure that 1st booting preference of your machine is from DVD, if not then after restarting the machine press F12 to get BIOS options and change booting preference to DVD.
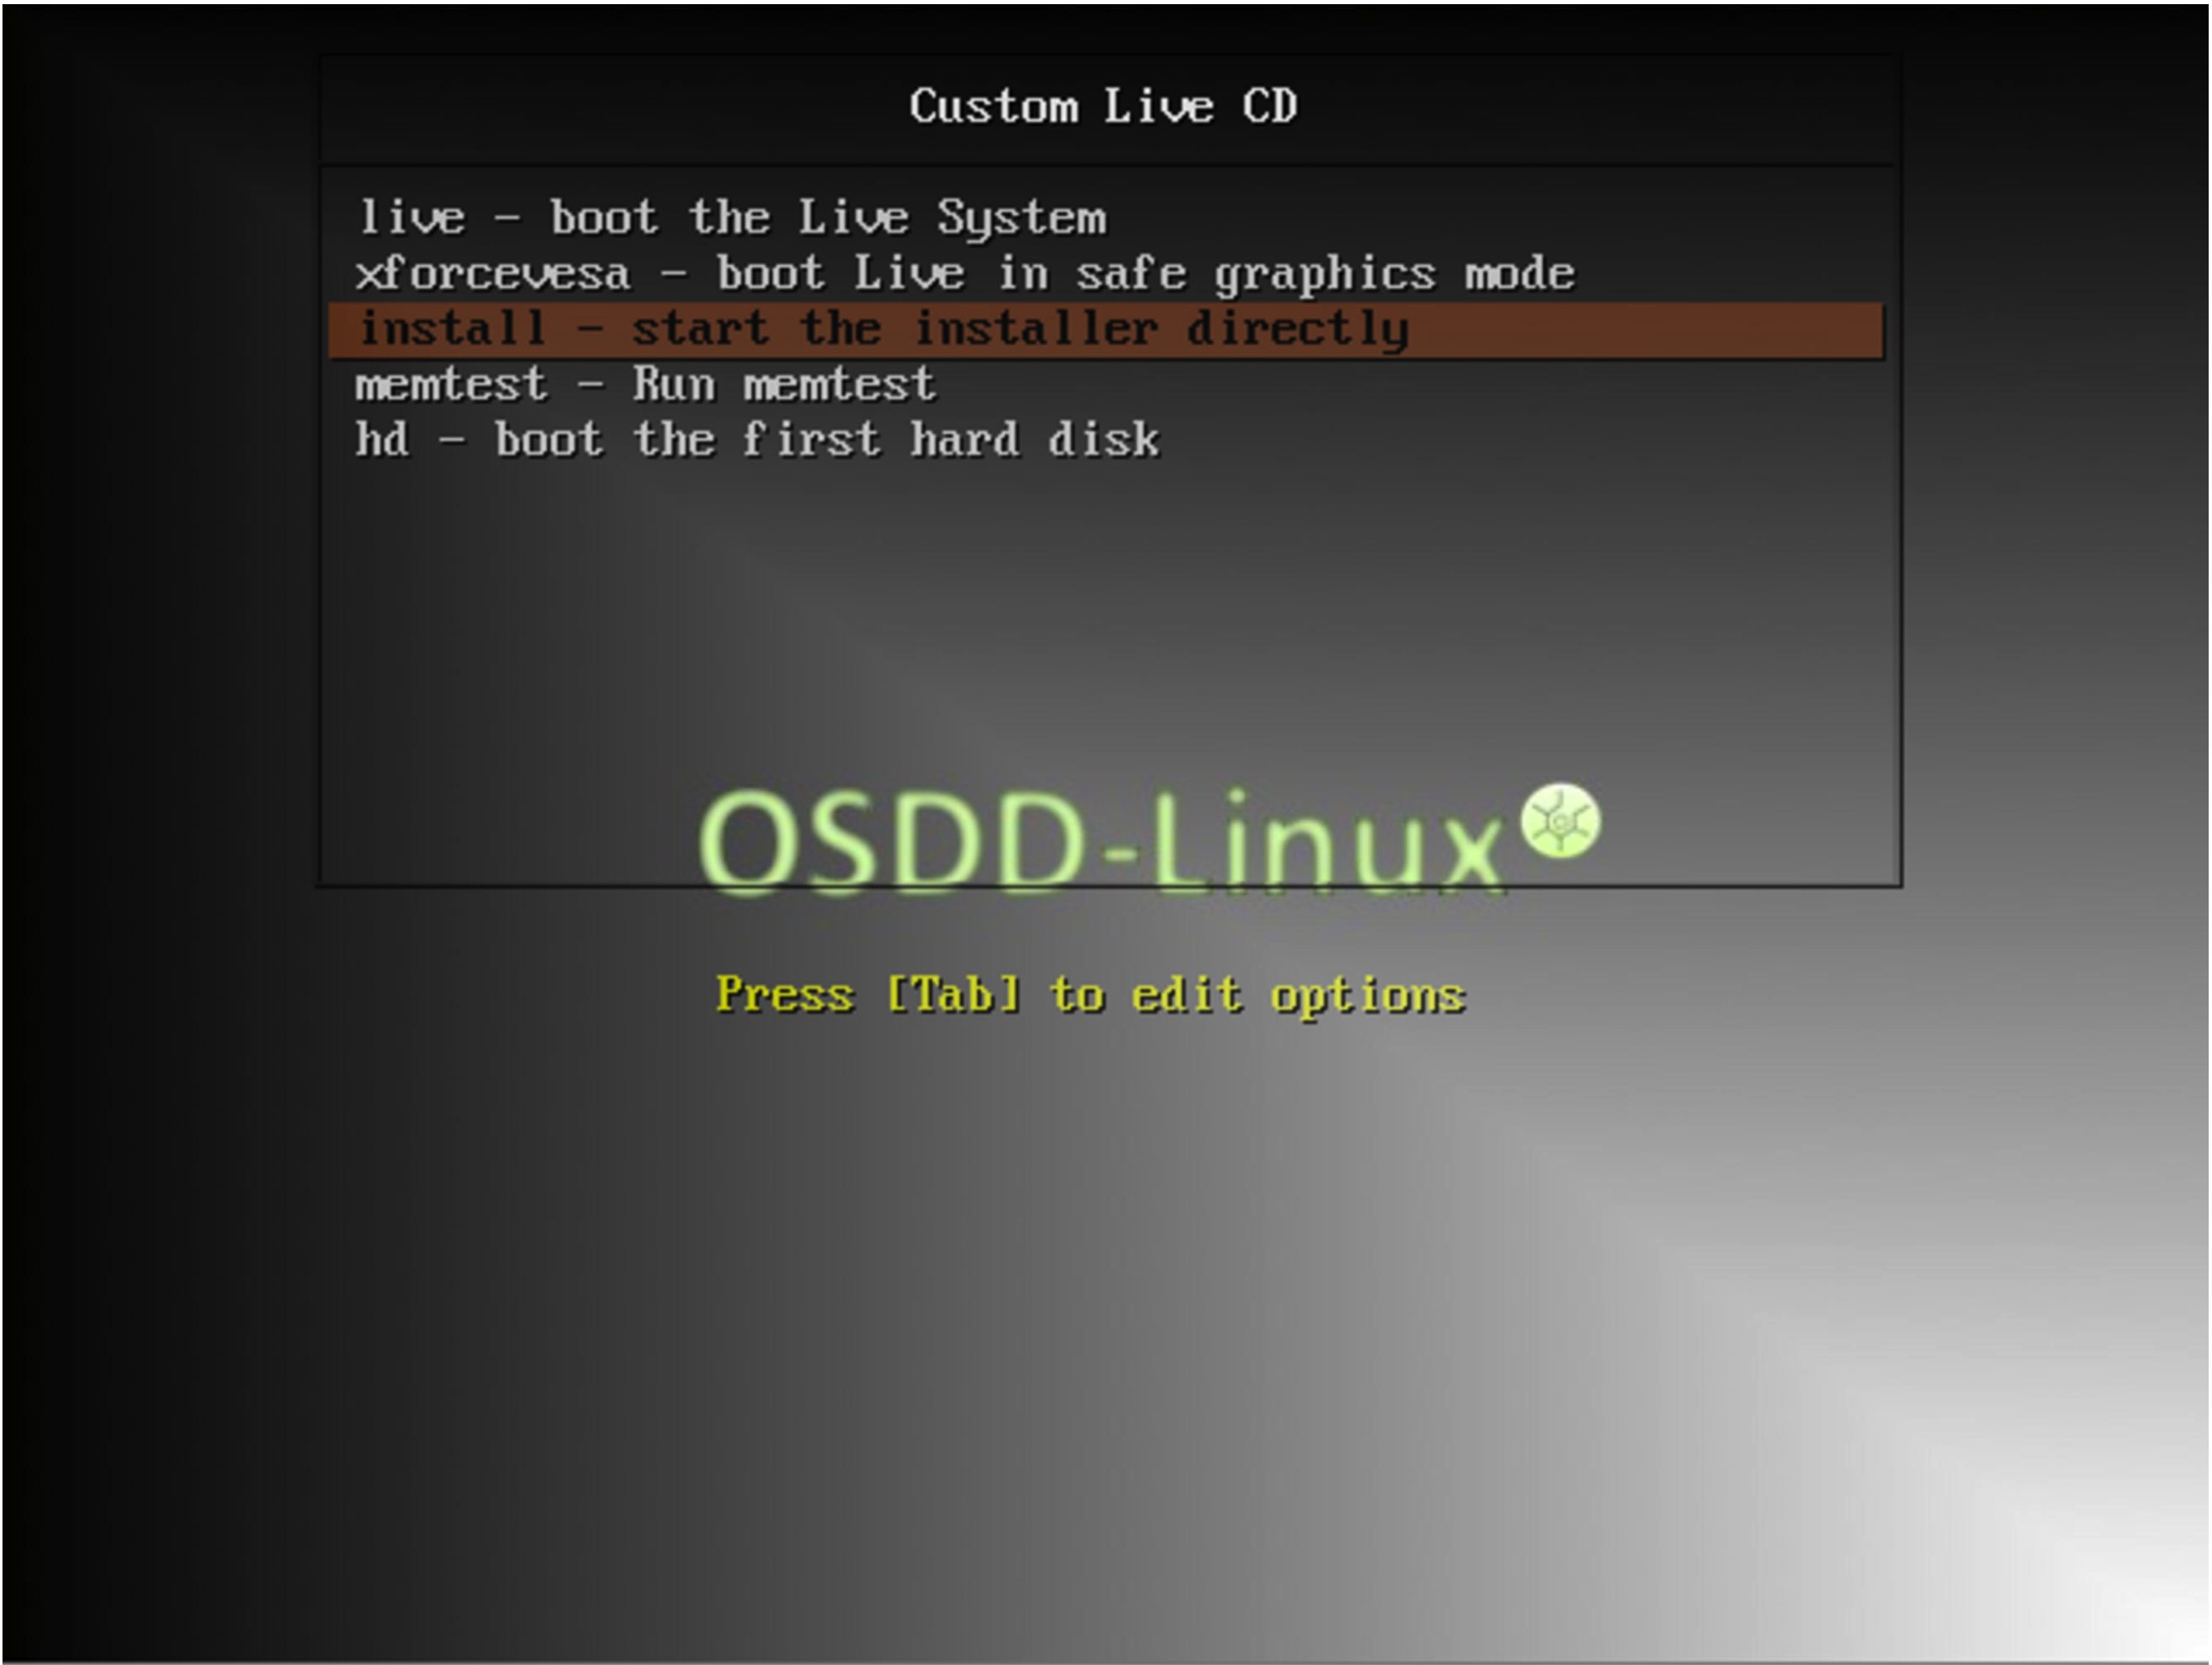
- Now you will get install options for OSDDlinux as displayed in the figure below. Choose the 3rd option i.e. "install - start the installer directly" and press enter as shown in the figure. Click on the image to enlarge.
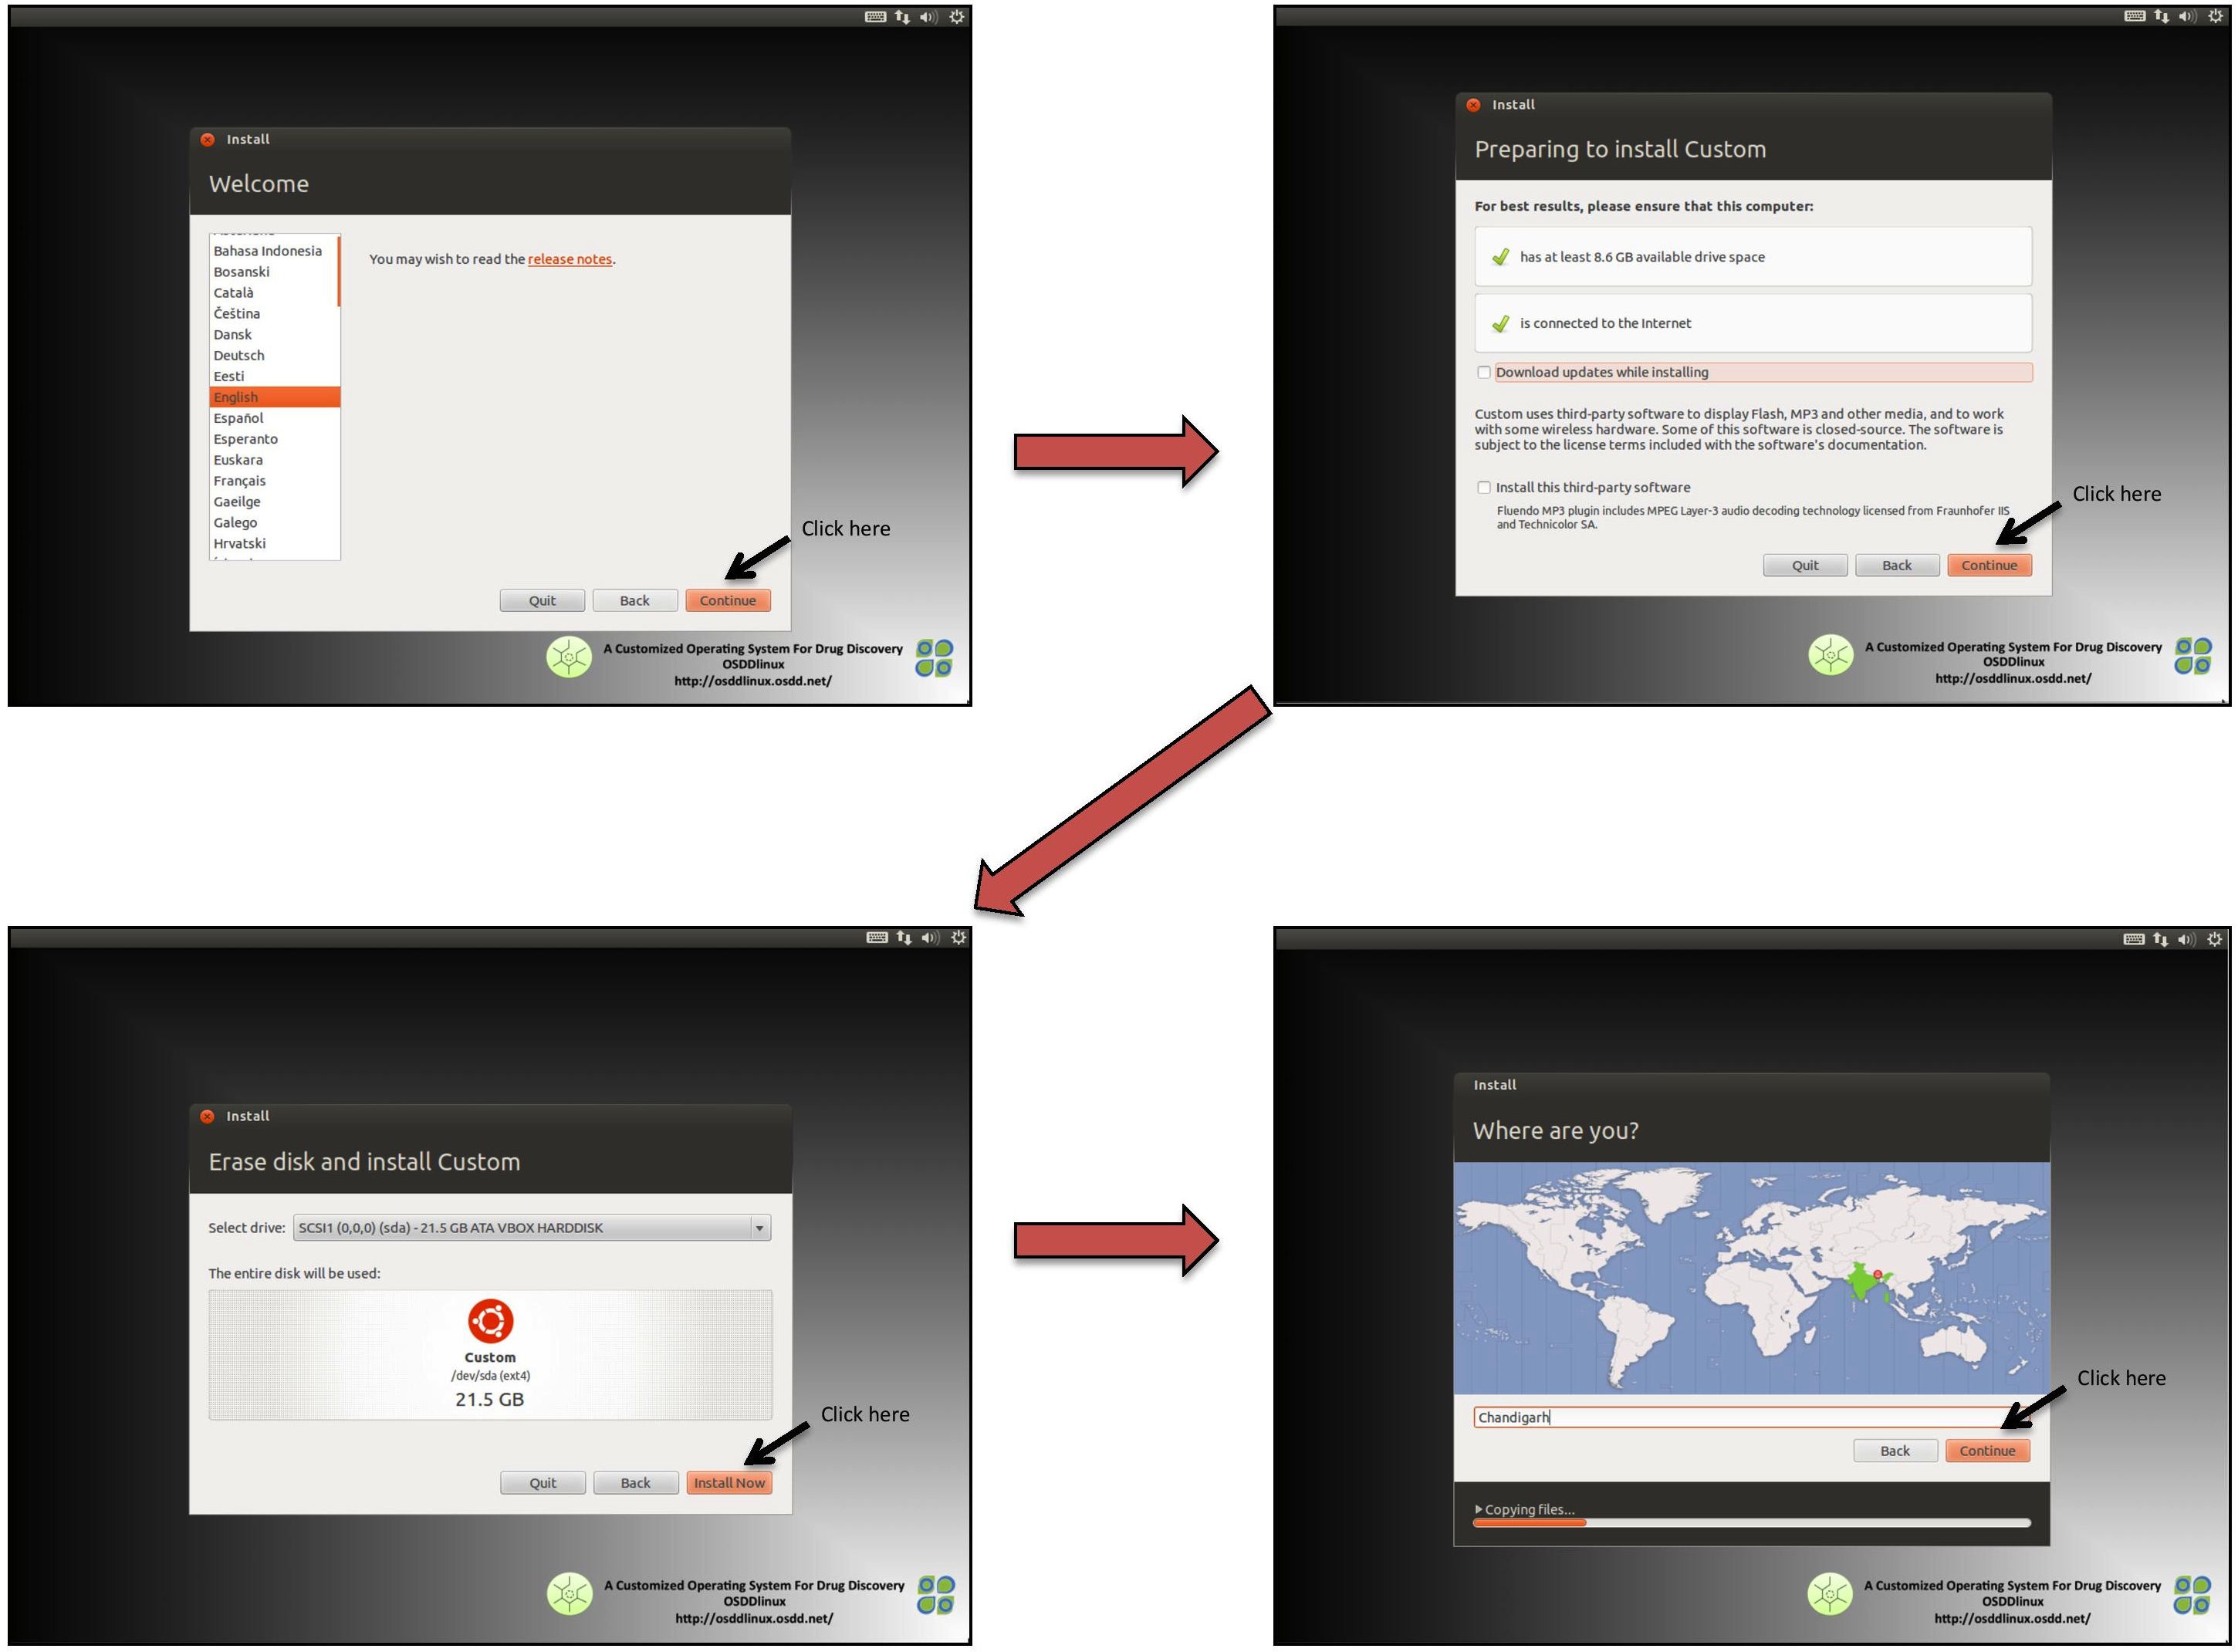
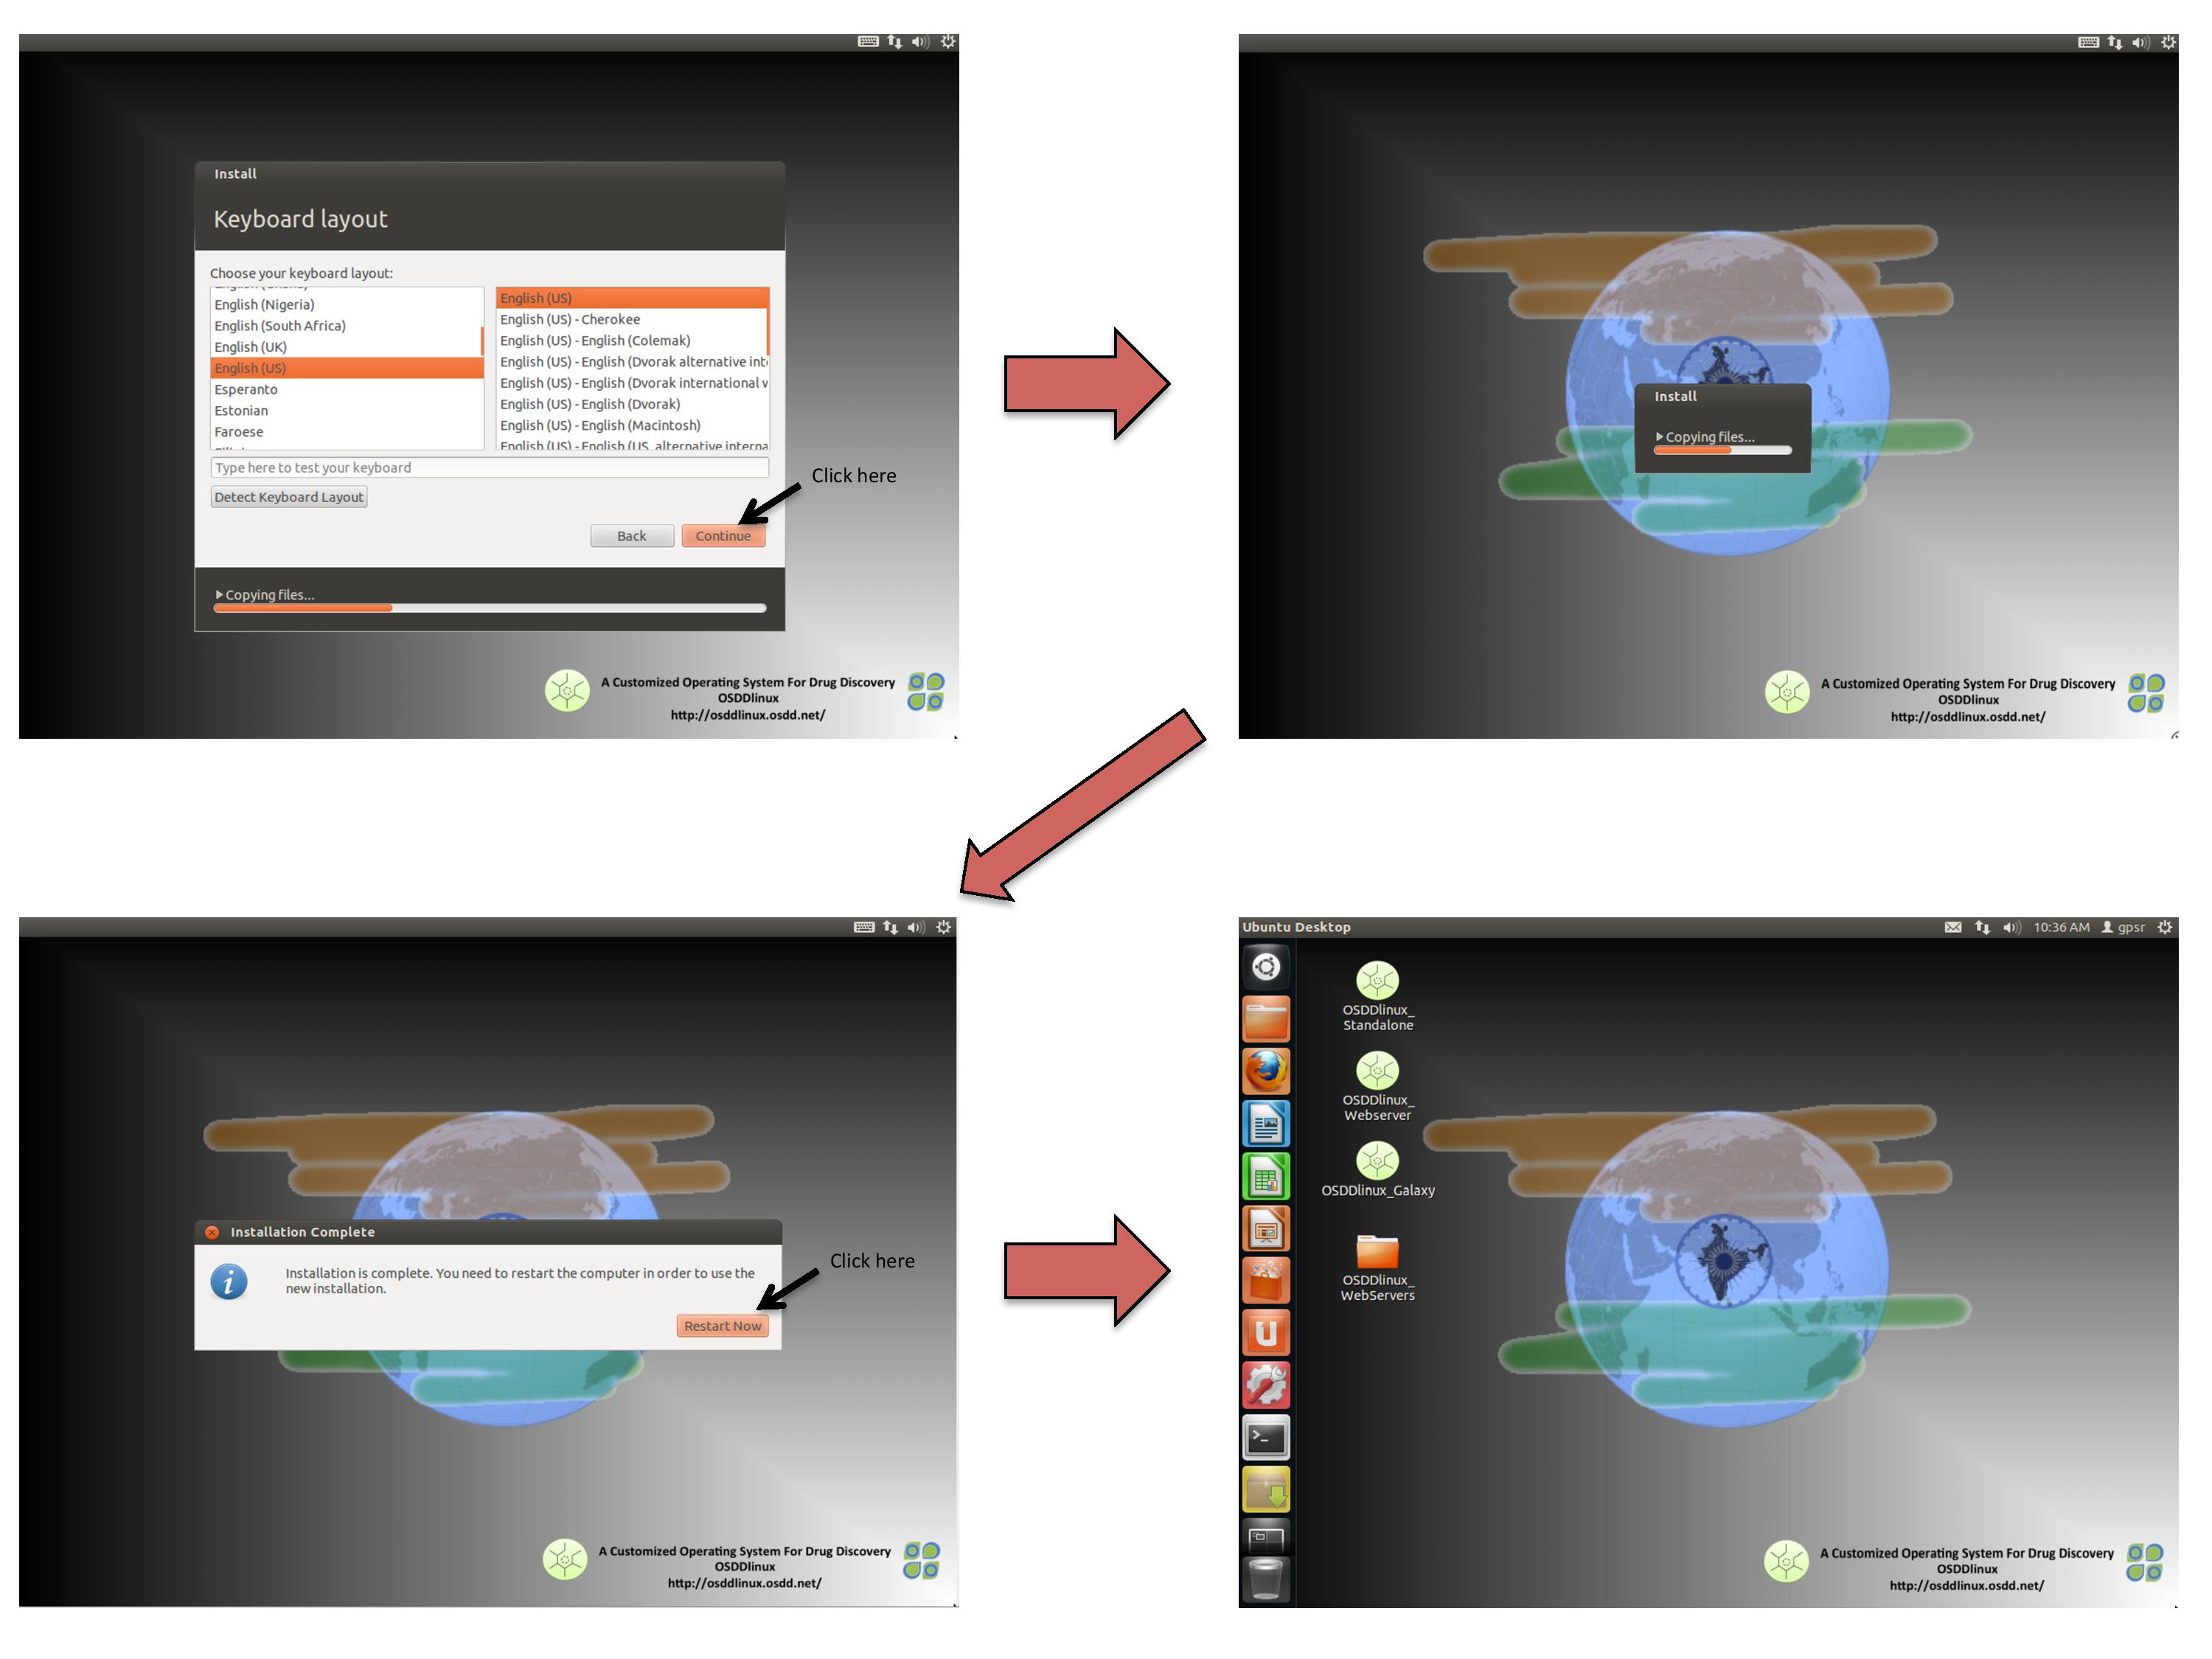
- Follow the instructions on the screen for full installation of OSDDlinux as shown in the figures below. Click on the image to enlarge.
- Select your preferable settings for language/country and install the OSDDlinux as shown below.
- Now you can use OSDDlinux resources such as webservers, standalone softwares, etc
NOTE: If you have installed Minimum infrastructure of OSDDlinux (i.e. OSDDlinux_base), after installation you need to follow special instructions to upgrade to OSDDlinux_full version. Click here to follow the instructions.
Steps for full Installation of OSDDlinux using bootable Live USB:
- User should download one of the following types of OSDDlinux ISO images available for installation
64-bit Architecture
32-bit Architecture
- Insert your USB drive in machine and identify its mount point. You can run "df -h" command on the terminal to identify its mount point. For example /dev/sda3
- Open terminal and run following command from terminal
zcat OSDDlinux_gpsr.gz | sudo tee /dev/sda3 >/dev/null
- Now reboot your system and ensure that 1st booting preference of your machine is from USB. If not, then after restarting the machine press F12 to get BIOS options and change booting preference to USB
- Now you will get install options for OSDDlinux as displayed in the figure below. Choose the 3rd option i.e. "install - start the installer directly" and press enter as shown in the figure. Click on the image to enlarge.
- Follow the instructions on the screen for full installation of OSDDlinux as shown in the figures below. Click on the image to enlarge.
- Select your preferable settings for language/country and install the OSDDlinux as shown below.
- Now you can use OSDDlinux resources such as webservers, standalone softwares, etc
NOTE: If you have installed Minimum infrastructure of OSDDlinux (i.e. OSDDlinux_base), after installation you need to follow special instructions to upgrade to OSDDlinux_full version. Click here to follow the instructions.
Upgrade OSDDlinux_base to OSDDlinux_full version
This section is designed for users who have installed OSDDlinux_base in their machine. OSDDlinux_base provides minimum architecture with minimum software packages and needs to be upgraded in order to use all the software packages which comes in OSDDlinux_full version. This page provides step by step instructions for upgradation.
Steps to upgrade:
- Using downloaded tar files
- Download the compressed tar files of additional packages (in the form of .tar.gz) from the following link http://osddlinux.osdd.net/download/ubuntu/64bit/packages/additional
- Copy the following downloaded files in /gpsr/ directory
data.tar.gz galaxy.tar.gz models.tar.gz webserver.tar.gz
- uncompress and detar the files in /gpsr/ directory using following command
tar -zxvf data.tar.gz galaxy.tar.gz models.tar.gz webserver.tar.gz
- Using rsync option
- Use following command to copy additional packages for upgradation
rsync -avz osddlinux.osdd.net::osddlinux/ubuntu/64bit/packages/* /gpsr/
- Following files will be copied in /gpsr/ directory
data.tar.gz galaxy.tar.gz models.tar.gz webserver.tar.gz
- uncompress and detar the files in /gpsr/ directory using following command
tar -zxvf data.tar.gz galaxy.tar.gz models.tar.gz webserver.tar.gz
- Using deb file
- Download the deb file "OSDDlinux_base_to_full.deb" from the link given below
http://osddlinux.osdd.net/repo/OSDDlinux_base_to_full.deb
- Type following command in terminal to upgrade base version to full version
sudo dpkg -i OSDDlinux_base_to_full.deb
- Now your system is upgraded to OSDDlinux_full version with all the additional packages installed in the machine
- Using apt-get command
- open /etc/apt/sources.list file using following command
sudo vi /etc/apt/sources.list
- add following line (repository) at the bottom of the file
deb http://osddlinux.osdd.net/repo amd64/ for 64 bit systems
deb http://osddlinux.osdd.net/repo i386/ for 32 bit systems
If the line is already present in the file then ignore the step 2
- Run following command to update the repository
sudo apt-get update
- Run following command to upgrade to OSDDlinux_full
sudo apt-get install OSDDlinux_base_to_full
- Now your system is upgraded to OSDDlinux_full version with all the additional packages installed in the machine